Echo Eliminator™ Adhesive Installation
Cleaning & MaintenanceAccumulation of dust and dirt are best removed with a soft brush attachment on a vacuum cleaner. Use vacuum attachments with at least 1″ soft brushes to avoid damage to the panel. Do not use water or cleaning solutions.
Cutting & Trimming:For field cutting panels of any size or thickness, we recommend that the product be cut on a table saw with a standard 8″ round blade with no teeth (similar to a meat carving blade).
1″ material can be cut straight through with one pass. 2″ or thicker material should be cut halfway through the thickness of the material, then flipped over and cut again along the same line. This cutting method will deliver the same square edge detail that the product was originally delivered with.
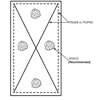
Wall Installation – Adhesive:Make sure that the surface to which the panels are being applied to is clean and free from dust in order to ensure a good bonding contact.
-
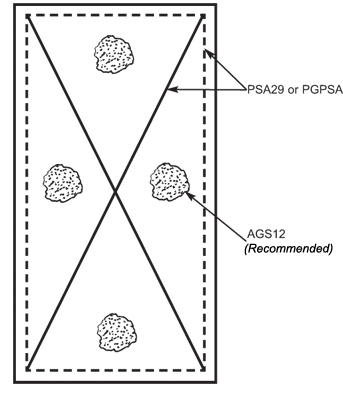
Using GreenSeries Adhesive (PSA29) or PowerGrab Adhesive (PGPSA), cut the nozzle of the cartridge for a ¼″ bead of adhesive.
Apply adhesive from corner to corner on the panel in an ‘X’ pattern, then a perimeter ¼″ bead, ¾″ from the edges.
OPTIONAL – For a fast, instant attachment:
-
Apply a 6″ circle of Spray Adhesive (AGS12) in each of the quadrants (as shown in diagram).
Apply pressure to both the bead adhesive and the sprayed areas.
The spray adhesive will keep the panel in place while the bead adhesive cures to provide a long lasting permanent bond.
-
When installing Echo Eliminator panels to a ceiling, it is recommended to use Spray Adhesive (AGS12) in conjunction with GreenSeries Adhesive (PSA29) or PowerGrab Adhesive (PGPSA).
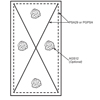
Make sure that the surface to which the panels are being applied to is clean and free from dust in order to ensure a good bonding contact.
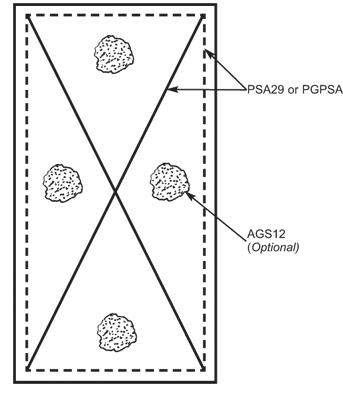
Using GreenSeries Adhesive (PSA29) or PowerGrab Adhesive (PGPSA), cut the nozzle of the cartridge for a ¼″ bead of adhesive.
Apply adhesive from corner to corner on the panel in an ‘X’ pattern, then a perimeter ¼″ bead, ¾″ from edges.
Apply a 6″ circle of Spray Ahdesive (AGS12) in each of the quadrants (as shown in diagram).
Apply pressure to both the bead adhesive and the sprayed areas. The spray adhesive will keep the panel in place while the bead adhesive cures to provide a long lasting, permanent bond.
Before attaching the panel to the ceiling, make an ‘X’ shape on the ceiling with the GreenSeries Adhesive (PSA29) or PowerGrab Adhesive (PGPSA). This ensures a permanent bond. Failure to add adhesive to ceiling before attaching the panel can result in the panels detaching from the ceiling.